Recent Videos
Let's talk!
How to Change Ink in Epson Printer? (WF-2510WF and XP-245)
-

Epson is a well-known brand that specializes in manufacturing a wide range of printers, including inkjet printers, laser printers, and all-in-one printers. Epson printers are known for their high-quality output, reliability, and innovative features.
Inkjet printers from Epson use small droplets of ink to create images and text on paper. They are popular for home and office use due to their versatility, cost-effectiveness, and ability to produce vibrant color prints. Epson's Precision Core technology, found in some of their inkjet printers, offers enhanced print quality and faster printing speeds.
Laser printers from Epson use laser technology to create images and text on paper. They are commonly used in office environments due to their high-speed printing capabilities, sharp text quality, and cost-effectiveness for high-volume printing.
Epson also offers all-in-one printers, which combine printing, scanning, and copying functionalities into a single device. These printers are designed to provide convenience and versatility, allowing users to perform multiple tasks with a single machine.
Epson printers are compatible with various operating systems, including Windows, macOS, and Linux, making them widely accessible to users across different platforms. They are often equipped with user-friendly features such as wireless connectivity, mobile printing capabilities, and intuitive control panels.
How to Change Ink in Epson Printer? (WF-2510WF and XP-245)
Here are step-by-step instructions for changing ink cartridges in two specific Epson printer models: the Epson WF-2510WF and the Epson XP-245. Please note that the instructions provided are a general guide, and it's always a good idea to consult the printer's manual for model-specific instructions.
Changing Ink in Epson WF-2510WF:
1. Turn on your Epson WF-2510WF printer.
2. Lift the scanner unit to access the ink cartridge holder.
3. Wait for the ink cartridge holder to stop at the cartridge replacement position.
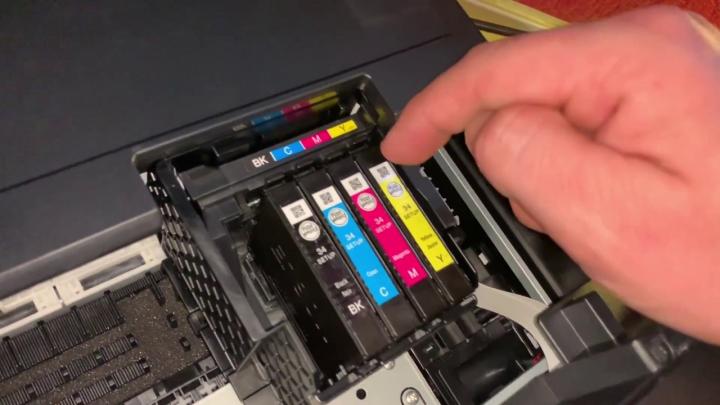
4. Locate the empty ink cartridge that you want to replace. Each color has a designated slot (e.g., black, cyan, magenta, yellow).
5. Press down on the empty cartridge to release it, and then remove it from the holder.
6. Take the new ink cartridge out of its packaging. Remove any protective tapes or seals from the cartridge.
7. Hold the new cartridge with the label facing up and the arrow pointing towards the printer.
8. Insert the new cartridge into the empty slot. Push it down until it clicks into place.
9. Repeat the process for any other cartridges that need to be replaced.
10. Close the scanner unit.
11. The printer will automatically start charging the ink. It may take a few minutes. Do not turn off the printer during this process.
12. Once the ink charging is complete, the printer is ready to use.
Changing Ink in Epson XP-245:
1.Turn on your Epson XP-245 printer.
2. Lift the scanner unit to access the ink cartridge holder.
3. Wait for the ink cartridge holder to stop at the cartridge replacement position.
4. Locate the empty ink cartridge that you want to replace. Each color has a designated slot (e.g., black, cyan, magenta, yellow).
5. Squeeze the tab on the cartridge holder and lift it up. This will release the empty cartridge.
6. Remove the empty cartridge from the holder.
7. Take the new ink cartridge out of its packaging. Remove any protective tapes or seals from the cartridge.
8. Shake the new cartridge gently before opening the package.
9. Open the package and remove the yellow tape from the cartridge.
10. Insert the new cartridge into the holder. Push it down until it clicks into place.
11. Push the cartridge holder down until it locks into place.
12. Close the scanner unit.
13. The printer will automatically start charging the ink. It may take a few minutes. Do not turn off the printer during this process.
14. Once the ink charging is complete, the printer is ready to use.
Remember, these instructions are a general guide and may vary slightly depending on your specific printer model. It's always best to refer to the printer's manual for detailed instructions and troubleshooting information.
Thank You!
Source-
https://quickprinterservices24x7.co/how-to-change-ink-in-epson-printer/
(1-800-319-5804)

